Creating template files with R
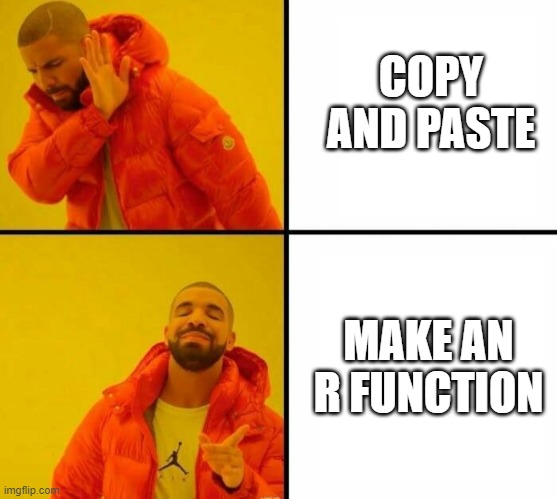
Over the past few months, I’ve found myself fine-tuning the structure of my R scripts for #TidyTuesday, and each week they have similar sections: load packages, load data, data wrangling, make a plot, save the plot, and so on. What I’ve ended up doing recently is copying and pasting the script from the previous week, and then removing the unnecessary parts. And I do the same thing with the README files for GitHub - there’s (almost) always a title, a .png file with the final chart, and a .gif file (recorded with {camcorder}) showing the evolution of the chart. And, you guessed it, I usually copy and paste the file from the previous week then update the file names.
I’m sure many of you will have similar problems - where the interactive nature of the task means you can’t fully automate it, but you’re also doing something sort of similar repeatedly. Like many things in the world of programming, if you find yourself copying and pasting the same thing several times, there is almost certainly a better way of doing it. And in this case there is - template files!
Creating folders and files
But first, let’s make somewhere to keep our new files! For each week, I have a week folder with the name format yyyy-mm-dd nested inside a year folder with the format yyyy, and inside that folder I have a .R file with a name in the format yyyymmdd.R and a README.md file.
Note: It wasn’t always this organised and I lament the days of my
dd-mm-yyyyfile naming and how difficult it still is to find things…
All of these folders and files can be constructed based on the date alone. We’re eventually going to build a function with the date as an argument (called date_chr). Let’s start by defining a date as a variable, then extracting the year and the date (without the - separators) from it.
date_chr <- "2023-08-22"
yr <- sub("-.*", "", date_chr)
date_strip <- stringr::str_remove_all(date_chr, "-")
Assuming that we’re in the directory where we want to create folders (e.g. the root of the #TidyTuesday repository), then we can make the year and week folders if they don’t already exist:
new_folder <- file.path(yr, date_chr)
if (!file.exists(new_folder)) {
  dir.create(new_folder, recursive = TRUE)
  message("Created new folder")
}
Here, the recursive = TRUE argument means that all elements of the path e.g. both the2023 and the nested 2023-08-22 folders are created if they need to be. Once we have folders, it’s time to add some (empty) files! Let’s create a .R file named 20230822.R, making sure we check if it exists first to avoid accidentally overwriting any existing work. We can also optionally return a message to say the file has successfully been created.
new_file <- file.path(yr, date_chr, paste0(date_strip, ".R"))
if (!file.exists(new_file)) {
  file.create(new_file)
  message("Created '.R' file")
}
We can do the same for the README.md file:
new_readme <- file.path(yr, date_chr, "README.md")
if (!file.exists(new_readme)) {
  file.create(new_readme)
  message("Created 'README.md' file")
}
Now let’s put some things into those files…
Creating a template README file
Let’s start with a template for the README.md file since it’s a little bit simpler. An example of one of my README files looks like this:
<h1 align="center"> Refugees </h1>

<p align="center">
  <img src="/2023/2023-08-22/20230822.png" width="60%">
</p>

The making of this visualisation was also recorded using the {camcorder} package.

<p align="center">
  <img src="/2023/2023-08-22/20230822.gif" width="60%">
</p>
Here, I’m using HTML code rather than just Markdown since GitHub understands it, and it gives me a bit more control over how the images and text appear. Let’s generalise this and replace the specific dates with variables:
<h1 align="center"> Title </h1>

<p align="center">
  <img src="/yr/date_chr/date_strip.png" width="60%">
</p>

The making of this visualisation was also recorded using the {camcorder} package.

<p align="center">
  <img src="/yr/date_chr/date_strip.gif" width="60%">
</p>
We can save this as a readme-template.md file. If you plan to add this into an R package, you can save this file in the inst folder. Otherwise, keep it somewhere that you know where it is, e.g. in a utils folder in your #TidyTuesday repository. Now we want to copy the contents of this template file, replace the yr, date_chr, and date_strip variables with the actual values, and write to our newly created README.md file:
# copy lines to README file
readme_txt <- readLines("readme-template.md")

# replace placeholder text with variables
readme_txt <- gsub(pattern = "yr", replacement = yr, x = readme_txt)
readme_txt <- gsub(pattern = "date_chr", replacement = date_chr, x = readme_txt)
readme_txt <- gsub(pattern = "date_strip", replacement = date_strip, x = readme_txt)

# write to file
writeLines(readme_txt, con = new_readme)
message("'README.md' contents copied")
Creating a template .R file
The process for creating, copying, and writing the .R file will be similar to the README template process. Let’s start by creating a file r-template.R. This will be very specific to your use case, and for me it’s a file that’s evolved over several years of #TidyTuesday contributions. In this file, I’ll
- load packages that I use often
- load fonts I commonly use
- read in the data
- set up the {camcorder} recording
- create code block sections for tasks I do each week
Again, like the README file, instead of hard-coding any date values, I’ll replace them with the yr, date_chr, and date_strip variables:
# Load packages -----------------------------------------------------------

library(tidyverse)
library(showtext)
library(patchwork)
library(camcorder)
library(ggtext)
library(nrBrand)
library(glue)


# Load data ---------------------------------------------------------------

tuesdata <- tidytuesdayR::tt_load(date_chr)


# Load fonts --------------------------------------------------------------

font_add_google("Roboto", "roboto")
showtext_auto()


# Define colours ----------------------------------------------------------

bg_col <- ""
text_col <- ""
highlight_col <- ""


# Data wrangling ----------------------------------------------------------


# Start recording ---------------------------------------------------------

gg_record(
  dir = file.path(yr, date_chr, "recording"),
  device = "png",
  width = 7,
  height = 5,
  units = "in",
  dpi = 300
)


# Define text -------------------------------------------------------------

social <- nrBrand::social_caption(
  bg_colour = bg_col,
  icon_colour = highlight_col,
  font_colour = text_col,
  font_family = "roboto"
)
title <- ""
st <- ""
cap <- paste0(
  "**Data**: <br>", social
)


# Plot --------------------------------------------------------------------


# Save gif ----------------------------------------------------------------

gg_playback(
  name = file.path(yr, date_chr, paste0(date_strip, ".gif")),
  first_image_duration = 4,
  last_image_duration = 20,
  frame_duration = .25,
  background = bg_col
)
Setting up comment sections in R files can be really helpful for organising and structuring your code in a more modular way - it also means you code is partly pre-commented! Here, I’ve also loaded a personal R package, {nrBrand}, that writes the plot caption with social media icons. If you want to find out more about how to create your own, you can read my previous blog post on Adding social media icons to charts with {ggplot2}. Using the tidytuesdayR::tt_load() function, which takes a date as input, means I can automatically load the data in as well - although I still need to look at the rfordatascience repository to find out what the data actually is!
Now let’s do the same thing as before: and copy the contents of this template file, edit to change the variable values, and write to the .R file we already created:
# copy lines to .R file
r_txt <- readLines("r-template.R")

# replace placeholder text with variables
r_txt <- gsub(pattern = "yr", replacement = paste0("\"", yr, "\""), x = r_txt)
r_txt <- gsub(pattern = "date_chr", replacement = paste0("\"", date_chr, "\""), x = r_txt)
r_txt <- gsub(pattern = "date_strip",vreplacement = paste0("\"", date_strip, "\""), x = r_txt)

# write to new file
writeLines(r_txt, con = new_file)
message("'.R' contents copied")
The only thing that’s different about this code is the replacement argument. Here, we want to make sure that we copy with quotation marks, not just the variable value. For example, we want to replace date_chr with "2023-08-22" not 2023-08-22.
Building a function
Although you could leave all this code in a script, it will be much easier to use if you wrap it into a function. When putting this code into a function, there were a couple of key things I kept in mind:
place the code where you read, modify, and write the template files to your new files inside the
ifstatement that checks if the file already exists. You don’t want to overwrite any files that already exist if you put in the wrong date.check that the date is in the correct format since this will save some headaches with creating files with the wrong name:
# check date in correct format
if (is.na(as.Date(date_chr, format = "%Y-%m-%d"))) {
  stop("'date_chr' in incorrect format. Should be yyyy-mm-dd.")
}
when you start making R functions, you usually need somewhere to put them - an R package is a great place to keep them! You can store the template files in the
instfolder, and then access them again later withreadLines(system.file("r-template.R", package = "pkgname")).sometimes I’ll use a similar workflow but create different outputs, such as animations, that would require a different README layout so I’ve left the README creation as an optional task with a
readme = TRUEdefault argument.
Show code: see the complete function
use_tt_template <- function(date_chr = "2023-08-22",
                            readme = TRUE) {
  # check date in correct format
  if (is.na(as.Date(date_chr, format = "%Y-%m-%d"))) {
    stop("'date_chr' in incorrect format. Should be yyyy-mm-dd.")
  }
  # get year from date
  yr <- sub("-.*", "", date_chr)
  date_strip <- stringr::str_remove_all(date_chr, "-")
  # make folder
  new_folder <- file.path(yr, date_chr)
  if (!file.exists(new_folder)) {
    dir.create(new_folder, recursive = TRUE)
    message("Created new folder")
  }
  # make new file
  new_file <- file.path(yr, date_chr, paste0(date_strip, ".R"))
  if (!file.exists(new_file)) {
    file.create(new_file)
    message("Created '.R' file")
    # copy lines to .R file
    r_txt <- readLines(system.file("r-template.R",
      package = "usefunc",
      mustWork = TRUE
    ))
    # replace placeholder text with variables
    r_txt <- gsub(
      pattern = "yr",
      replacement = paste0("\"", yr, "\""),
      x = r_txt
    )
    r_txt <- gsub(
      pattern = "date_chr",
      replacement = paste0("\"", date_chr, "\""),
      x = r_txt
    )
    r_txt <- gsub(
      pattern = "date_strip",
      replacement = paste0("\"", date_strip, "\""),
      x = r_txt
    )
    # write to new file
    writeLines(r_txt, con = new_file)
    message("'.R' contents copied")
  }

  if (readme) {
    # make new README file
    new_readme <- file.path(yr, date_chr, "README.md")
    if (!file.exists(new_readme)) {
      file.create(new_readme)
      message("Created 'README.md' file")
      # copy lines to README file
      readme_txt <- readLines(system.file("readme-template.md",
        package = "usefunc",
        mustWork = TRUE
      ))
      # replace placeholder text with variables
      readme_txt <- gsub(
        pattern = "yr", replacement = yr, x = readme_txt
      )
      readme_txt <- gsub(
        pattern = "date_chr", replacement = date_chr, x = readme_txt
      )
      readme_txt <- gsub(
        pattern = "date_strip", replacement = date_strip, x = readme_txt
      )
      # write to file
      writeLines(readme_txt, con = new_readme)
      message("'README.md' contents copied")
    }
  }
  message("Template successfully copied!")
}
Additional resources
If you’ve never made a function in R before, the R for Data Science book has some excellent information and examples to get started!
The {usethis} package has a use_rmarkdown_template() function for adding your own custom RMarkdown templates if you’d prefer .Rmd files instead of .R files.
If you’re interested in automating parts of your data science workflows, I’d highly recommend you look into GitHub Actions (or GitLab CI/CD). You can read about how I used GitHub Actions to refresh data and redeploy a Shiny app on a schedule in my blog post from last year on Automatically deploying a Shiny app for browsing #RStats tweets with GitHub Actions. I could do something similar here if I wanted to create these template files automatically every Tuesday morning!
 {width=“80%” fig-alt=“Gif of dog typing on laptop fig-align=”center”}
Reuse
Citation
@online{rennie2023,
  author = {Rennie, Nicola},
  title = {Creating Template Files with {R}},
  date = {2023-08-22},
  url = {https://nrennie.rbind.io/blog/script-templates-r/},
  langid = {en}
}