ui <- navbarPage(
  title = "{shinytweet}",
  theme = bs_theme(
    version = 4,
    bootswatch = "minty",
    primary = "#12a79d"
  ),
  tabPanel(
    "Favourite Tweets",
    reactable::reactableOutput("table_output")
  )
)Automatically deploying a Shiny app for browsing #RStats tweets with GitHub Actions
R
Git
Shiny
Docker
This tutorial blog will show you how to use GitHub Actions to automatically update a data source and re-deploy a Shiny app, with an example Shiny application which uses {rtweet} to browse R-related tweets.
A little while ago I saw this blog post by Craig Hamilton shared on Twitter. In it, he describes the process of building a Shiny app to search through his favourited tweets, after noting the difficulty of searching through tweets he had liked to find a link he wanted to look at later. Inspired by the blog post, I decided to build a similar Shiny app for my own tweets. This blog post is the story of how it went.
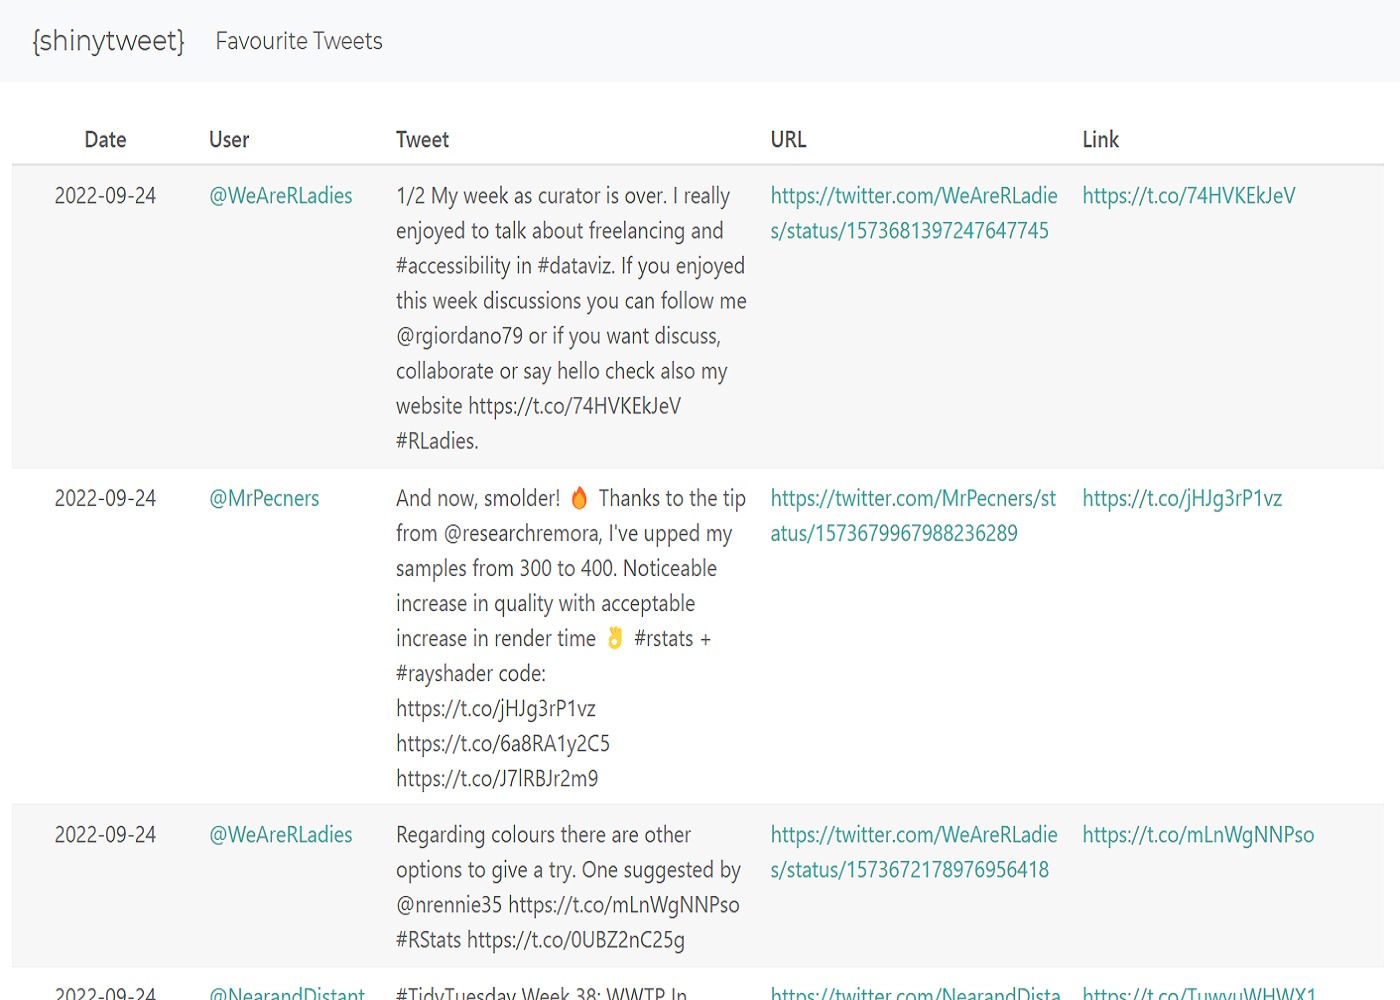
Building the Shiny app
The Shiny app itself is actually relatively simple in comparison to some other Shiny apps I’ve worked on - it will only contain a table of data. So first of all, we need to get that data…
1. Obtain the Twitter data
The blog post by Craig Hamilton covers how to get the Twitter data using the {rtweet} package, so I won’t reiterate it all here. Essentially, the steps we follow are:
use the
get_favorites()function from {rtweet} to get data on the tweets that I have liked. You’ll need to have a Twitter developer account in order to be able to authenticate through {rtweet};filter the tweets returned to include only those containing phrases such as rstats, tidyverse, or rstudio, and a link to an external source e.g. a link to a GitHub repository or a blog post;
perform a little bit of data wrangling to tidy up the URLs;
save the data as, e.g. a .rds file.
One thing that did trip me up a little: it wasn’t obvious how to get the data on the author of the tweets I had liked using the get_favourites() function. It turns out if you use the default setting of parse = TRUE in get_favourites(), the author information isn’t returned in the tidied tibble. Instead, I had to set parse = FALSE to get the non-tidy json data from the Twitter API, and extract it manually.
Update: the maintainer of {rtweet}, Lluís Revilla Sancho, pointed out that you can use
users_data()to get the author data, and thencbind()to join in to the favourites data, whenparse = TRUE.
2. Write the UI code
As I said above, the UI for the app is simple - it only contains a table made using {reactable}:
Here, we added some minimal styling with bs_theme() - entirely optional. At some point in the future, I may add in some options to filter by topic, time range, or users. However, for this initial attempt I decided to keep it incredibly simple.
3. Write the server code
The code for the server is a little bit more complicated, though not by much. After reading in the data saved in the first step, we construct the table_output. Before creating the reactable table, there’s a little bit of data wrangling involved: selecting only the columns of our data we want to display, renaming some of those columns to something that’s more human-readable, and converting the date of the tweets to a date object. Due to the (not so friendly) format of the date that comes out of the Twitter API when we set parse = FALSE in get_favourites(), we use a non-exported function (rtweet:::format_date(Date)) from {rtweet} for the re-formatting.
# read in data
likes <- readRDS("likes.rds")

# build server
server <- function(input, output) {
  output$table_output <- reactable::renderReactable({
    table_df <- likes %>%
      select(
        created_at, user, full_text,
        tweet_link, content_url
      ) %>%
      rename(
        Date = created_at,
        User = user,
        Tweet = full_text,
        URL = tweet_link,
        Link = content_url
      ) %>%
      mutate(
        Date = rtweet:::format_date(Date),
        Date = as.Date(Date)
      )
    reactable::reactable(table_df,
      columns = list(
        Date = colDef(
          align = "center",
          minWidth = 60
        ),
        User = colDef(
          cell = function(User) {
            htmltools::tags$a(
              href = paste0(
                "https://twitter.com/",
                as.character(User)
              ),
              target = "_blank", paste0("@", User)
            )
          },
          minWidth = 60
        ),
        Tweet = colDef(
          align = "left",
          minWidth = 120
        ),
        URL = colDef(cell = function(URL) {
          htmltools::tags$a(
            href = as.character(URL),
            target = "_blank", as.character(URL)
          )
        }),
        Link = colDef(cell = function(Link) {
          htmltools::tags$a(
            href = as.character(Link),
            target = "_blank", as.character(Link)
          )
        })
      ),
      striped = TRUE,
      defaultPageSize = 8
    )
  })
}
To make the links in the table clickable, within the definition of the columns, we use htmltools::tags$a. To make the Shiny app a little bit more user-friendly, we also set striped = TRUE and defaultPageSize = 8 to make different tweets more distinguishable, and limit the number of tweets in one page.
Deploying the Shiny app
Now that we’ve built the shiny app and got it working locally, we want deploy it to shinyapps.io. If you’re working in RStudio IDE, the easiest way to deploy a Shiny app is to click the deploy button (next to Run App). If it’s the first time you’ve deployed to shinyapps.io, you’ll be prompted to authenticate. Alternatively, you can call deployApp() in the console to do the same thing.

However, this approach means that every time we want to make a change to our app, we manually need to re-deploy it - that’s a bit annoying. Instead, since the code is stored on GitHub, we can use GitHub Actions to automatically deploy our app for us, every time our code is pushed onto the main branch. This blog post from Roel Hogervorst was incredibly helpful, and I didn’t have to make too many adjustments to get this up and running.
The basic steps to get GitHub Actions up and running:
1. Create a new token on shinyapps.io
Even if you’ve already got a token and authenticated your app deployment to shinyapps.io, I think it’s a good idea to create a separate token, just for this project. To create a new token, click on your profile in the top right, then click Tokens. Click Add Token to create a new token.

2. Create a deploy script
Create a deploy script that passes the tokens to deployApp(). For me this script was called deploy.R, and looked a bit like this:
# Authenticate
setAccountInfo(
  name = Sys.getenv("SHINY_ACC_NAME"),
  token = Sys.getenv("TOKEN"),
  secret = Sys.getenv("SECRET")
)
# Deploy
deployApp(appFiles = c("ui.R", "server.R", "likes.rds"))
In the deployApp() call, you can also specify which files make up your app. This may just be a single app.R file, or it may be multiple files as in this example.
3. Create a dockerfile
We’re going to use Docker to deploy our Shiny app. Docker is a platform that allows you to build, test, and deploy applications by packaging everything your software needs to run into a container. This includes system dependencies, R packages, and code. If you’re new to Docker, the documentation is good place to start.
We create a Dockerfile that contains the instructions for how to build the container.
FROM rocker/shiny:4.2.1
RUN install2.r rsconnect tibble dplyr stringr rtweet htmltools lubridate bslib reactable
WORKDIR /home/shinytweet
COPY ui.R ui.R
COPY server.R server.R
COPY likes.rds likes.rds
COPY deploy.R deploy.R
CMD Rscript deploy.R
Essentially, the Dockerfile gives the instructions to install all the R packages we need, copy the files relating to our Shiny app, and then run the deploy script. The line WORKDIR /home/shinytweet defines the name of our app in the shinyapps.io url: it will be deployed to nrennie35.shinyapps.io/shinytweet.
4. Create a workflow for GitHub Actions
Then, we need to set up a GitHub Action that tells GitHub to auto-deploy our app when something changes on main. In a folder called .github/workflows, we create a file called deploy-shinyapps.yml. The name of the file doesn’t really matter, just that the file type is .yml, since this is how we write a workflow for GitHub Actions. This workflow is adapted from Roel Hogervorst’s blog post mentioned above.
name: Run on push master, main

# Controls when the action will run.
on:
  # Triggers the workflow on push or pull request events but only for the main branch
  push:
    branches: [ main, master ]

  # Allows you to run this workflow manually from the Actions tab
  workflow_dispatch:

# A workflow run is made up of one or more jobs that can run sequentially or in parallel
jobs:
  # This workflow contains a single job called "build"
  build:
    # The type of runner that the job will run on
    runs-on: Ubuntu-20.04

    # Steps represent a sequence of tasks that will be executed as part of the job
    steps:
      # Checks-out your repository under $GITHUB_WORKSPACE, so your job can access it
      - uses: actions/checkout@v2

      # build the docker image and give it the name main
      - name: Build image
        run: docker build -t main .
      # run the docker image supply the secrets from the github secrets store.
      - name: execute
        run: >
          docker run
          -e SHINY_ACC_NAME=${{ secrets.SHINY_ACC_NAME }}
          -e TOKEN=${{secrets.TOKEN}}
          -e SECRET=${{secrets.SECRET}}
          main
We give the action a name:, and tell it when to run in the on: section. In this case, we want it to run when something is pushed to main, or if we manually trigger it on GitHub. In the jobs: section, this GitHub action sets up R, adds the R packages we need, then builds the Docker container.
5. Add GitHub Secrets
Finally, to make sure that GitHub Actions can authenticate shinyapps.io account, we pass the three variables needed in our deploy.R script as GitHub Secrets. GitHub Secrets are found in the settings tab for the repository. Make sure the name of the secret is the same as the variable passed into deployApp(). In this case, we add three secrets: SHINY_ACC_NAME, TOKEN, and SECRET.
Updating the Shiny app
At the moment, our deployed Shiny app is essentially a static screenshot of tweets I had liked up to the point we deployed the app. Of course, I could manually pull the most recent data, and upload it to GitHub where it would be automatically re-deployed. But we can use GitHub actions to automate that as well. There are two steps to running an update:
1. Create an update script
In the same way that we created a deploy.R script to deploy our Shiny app, we can create an update-data.R script that, when run, updates the data. The code in this script is very similar to the process of initially grabbing the data through {rtweet} so I won’t go into a lot of detail here. However, the code is available on GitHub if you’re especially interested.
Basically, we want to grab tweets I liked since the last one recorded in the current data set, append that to the old data, and overwrite the data file.
2. Set up GitHub Actions
Now, we set up another GitHub Action to run the update-data.R script every day and push the data to main, which triggers a re-deploy of the app. This GitHub Action is a little more custom, and took a bit longer to figure out than the deployment actions, so I’ll go into a bit more detail here. First, define a new .yml file in the .github/workflows folder.
Define the name of the action and when it will run. cron: "0 8 * * *" tells GitHub to run it everyday at 8am. Adding workflow_dispatch: allows me to also trigger the workflow from the actions tab in GitHub. This is useful when de-bugging the initial setup, and also if I want to trigger a data refresh at a different time of day for some reason.
name: Update data

on:
  schedule:
    - cron: "0 8 * * *"
  workflow_dispatch:
Next, we define the jobs and set up R. This part is exactly the same as the deployment action.
jobs:
  update:
    runs-on: ubuntu-latest
    env:
      GITHUB_PAT: ${{ secrets.GITHUB_TOKEN }}
    steps:
      - uses: actions/checkout@v2

      - uses: r-lib/actions/setup-r@v2
        with:
          use-public-rspm: true
Then, we want to install any R packages our update-data.R script requires to run. In the deployment action, we did this through the Dockerfile, but here we write it directly into the GitHub actions file.
      - name: Install dependencies
        run: |
          install.packages(c("rtweet", "dplyr", "tibble",
          "stringr", "lubridate", "readr"))
        shell: Rscript {0}
Then we run our update script. Since {rtweet} requires authentication, we need to add another GitHub secret (TWITTER_BEARER) containing the token that gets passed to {rtweet}. The process is very similar to adding a token for authenticating shinyapps.io.
      - name: Update data
        run: |
          source("update_data.R")
        shell: Rscript {0}
        env:
          BEARER: ${{ secrets.TWITTER_BEARER }}
Finally, we push the changes to main. Once the new .rds file has been created in the update_data.R script, we need to push the changes to GitHub (in exactly the same we would if we ran it locally). The following step adds, commits, and pushes the changes to main, which triggers the running of the deploy workflow that’s already defined. The Shiny app is then updated and re-deployed with the new data.
      - name: Commit files
        run: |
          git config --local user.email "actions@github.com"
          git config --local user.name "GitHub Actions"
          git add --all
          git commit -m "add data"
          git push
And that’s it! The deployed app is available at nrennie35.shinyapps.io/shinytweet, and the source code is available on GitHub. I hope you’ve found this blog post a useful case study in automating some of your Shiny app workflows - now you can relax while GitHub Actions does your work for you!

Reuse
Citation
BibTeX citation:
@online{rennie2022,
  author = {Rennie, Nicola},
  title = {Automatically Deploying a {Shiny} App for Browsing {\#RStats}
    Tweets with {GitHub} {Actions}},
  date = {2022-10-03},
  url = {https://nrennie.rbind.io/blog/automatically-deploying-a-shiny-app-for-browsing-rstats-tweets-with-github-actions/},
  langid = {en}
}
For attribution, please cite this work as:
Rennie, Nicola. 2022. “Automatically Deploying a Shiny App for
Browsing #RStats Tweets with GitHub Actions.” October 3. https://nrennie.rbind.io/blog/automatically-deploying-a-shiny-app-for-browsing-rstats-tweets-with-github-actions/.